Kitchen Cabinet Makeover
Sorry for the late post everyone. We had a lot going on this weekend and my hubby's Grandpa passed away this morning so things have been pretty crazy. I am very grateful for my knowledge of the gospel and how families can be together forever. I know Grandpa is in a better place now and we will see him again someday. Happy Holidays everyone!The Inspiration
Like many of you I am sure, I love Pinterest. I see all of the cute homes and craft projects on people's boards and it inspires me to want to beautify my own. Thankfully, I have a husband who is really good with home makeover projects. When we first moved into our house, almost the whole place was covered in various shades of yellow, with the exception of my kitchen which was bright red. I felt like my house would be some circus clown's dream... Lol. It may have worked for the prior owners, but it was just not our style so we decided to do something about it. We painted the walls with neutral shades, tore out the massive, awkward, ugly yellow built in that was on the back wall in our family room, and tiled the floor where it used to be.We didn't do many projects after that for a while, but this summer we decided to make over our kitchen. I am sooooooo very glad that we did. I dream of a nice big kitchen with granite or quartz countertops, a tiled backsplash, and tons of storage for all of the random cooking appliances, toys, and gadgets we have collected over the years.... and we have a lot of them. Seriously, who really needs a dippin dots maker, cake pops pans, and a cotton candy machine???? While I don't have my dream kitchen just yet, my kitchen is now much more modern and much more me! Here is how we did it. :
To be honest, I did the research to find the best way to do it and my fabulous hubby did most of the actual refinishing. Brady and I love the look of espresso cabinets but our little kitchen does not get a lot of natural light and we were afraid that refinishing them all in a deeper shade would make the kitchen seem too dark. As a solution, I was inspired by this kitchen that I found on Shannon Berrey's Design Blog here with the top cabinets finished in white and the bottom in a brown shade. I still have not convinced my hubby to let me do the backsplash or stone treatment on the kitchen island... yet. :) Someday I am sure though.
Dream Kitchen

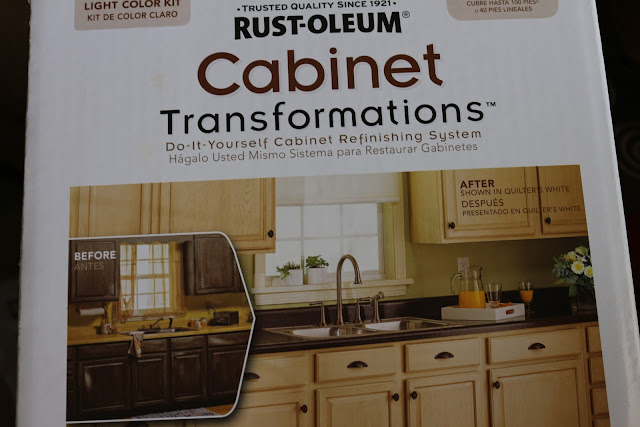
The product we used to make over the cabinets was Rust-Oleum Cabinet Transformations. We used two kits: one light and one dark. For the top cabinets, we used the white shade, unglazed, and for the bottom cabinets we used the espresso shade and applied the decorative glaze. You can view the full range of shades available here.The kit comes with pretty clear directions, so I will just give an overview of what we did and how it worked instead of the step-by-step tutorial.
The Transformation Kit
The Process
We started by removing the drawers from our island and doors from the cabinets along with the hardware then thoroughly cleaned and degreased them so the stain would adhere properly. Then we taped around the drawer fronts so we didn't get stain everywhere.
This picture below looks pretty cluttered visually, but I have to say it makes me laugh as you can see what I am talking about for our random kitchen gadgets. We were able to leave most of the stuff in the cabinets as long as it wasn't too close to the front. In this picture of the island you can see we have my baking pans, slow cooker, electric roaster, ice cream sandwich molds, and the George Forman G5 griddle/grill, waffle iron/panini press. An that doesn't include everything we have stuffed on top of the cabinets in those fabric bins you can see above or stored under the stairs in what we jokingly call our "Harry Potter Closet."

Then it was time to stain. We did the bottom cabinets first. We started with the cabinet bases then did the doors and drawer fronts. I am including the pictures for this part instead of the top as they are easier to see the difference. Below you can see the difference in color! For the dark bottom cabinets, we did two coats of the color and then added a coat of the decorative glaze. For the top cabinets, we tried adding the glaze from the light kit but discovered that the antique white shade we saw on the box swatches really translated into cabinets that looked white but just really, really dirty. We weren't so fond of that, so we decided to do another coat of the white over it instead....

Here is the finished product!
The bottom cabinets look stained and glazed, whereas the top ones look basically painted. Not quite what we expected, but we still like them. It definitely lightens up our kitchen and makes it feel so much more welcoming and fun. I definitely recommend this product for the darker shades in particular. The lighting in our kitchen is awful so I know the bottom shade looks black in these photos, but in normal lighting the shade looks more of a dark chocolate shade.


I am agree with your Blog.Thanks for the useful information.I have been reading a lot of stuff about it. but the way in it is presented is nice. thanks for sharing.....
ReplyDeleteQuartz worktops